A while back I built a BLE MIDI controller. I was never too happy with it and had been meaning to take another stab at it.
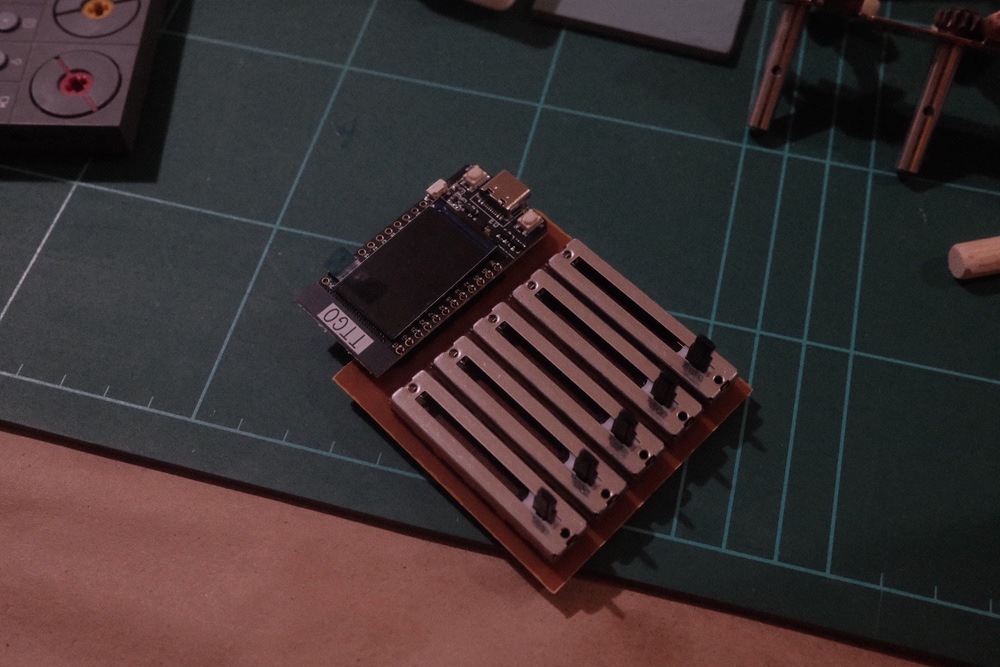
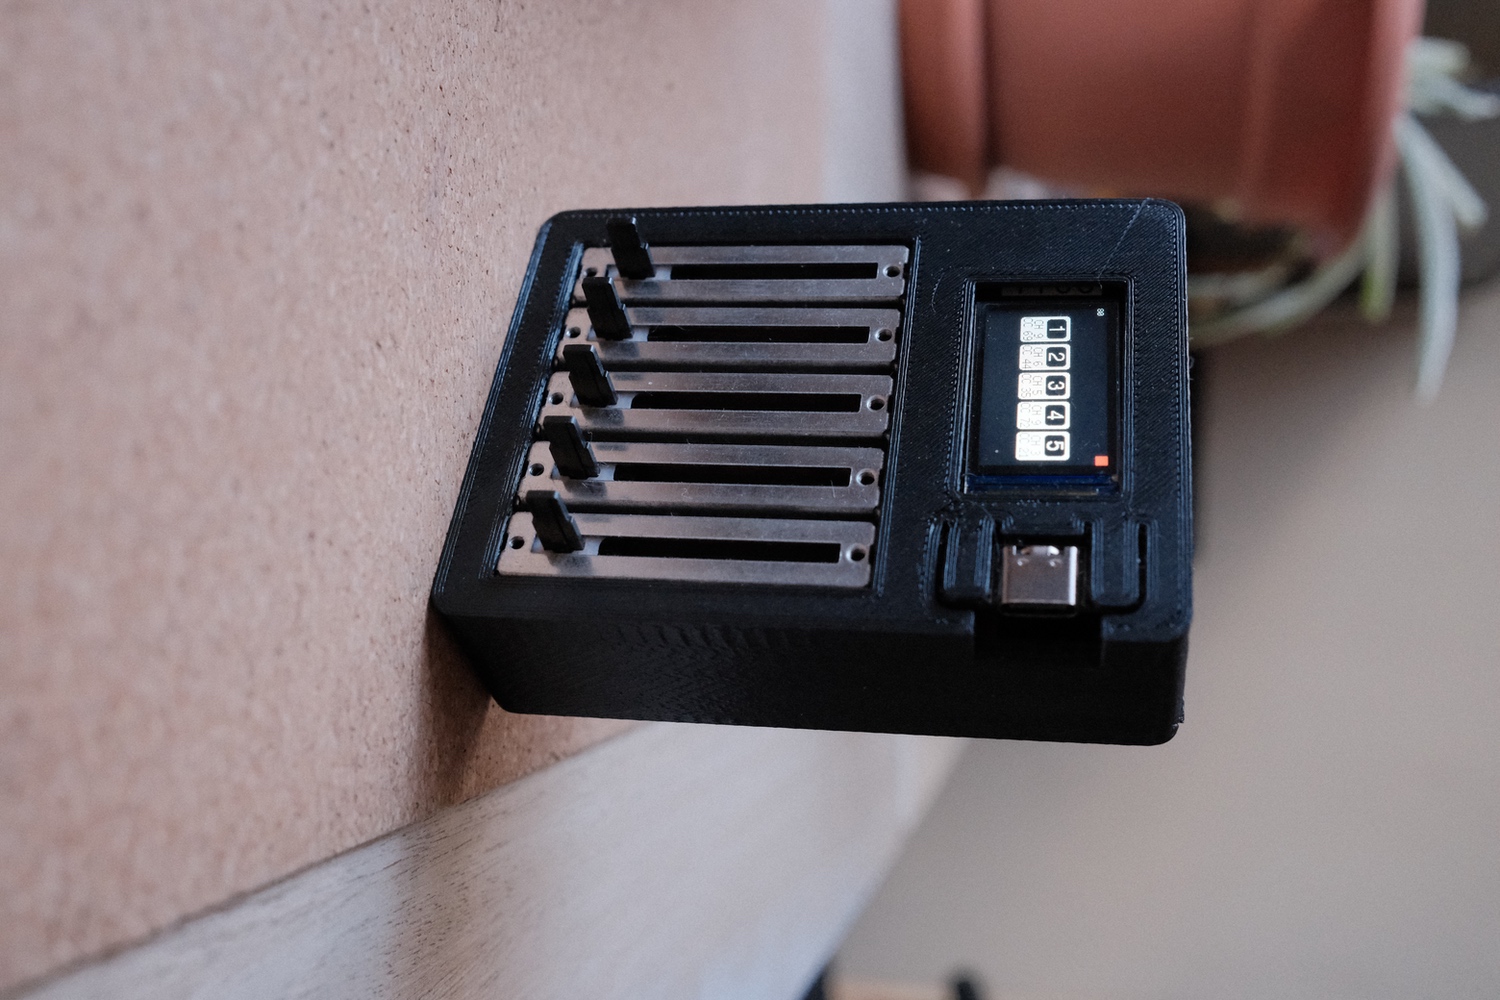
My plan is pretty simple, I want a 4 or 5 faders in a small battery-powered box. I recently came across a TTGO display board. It brings most of what I need onboard, bluetooth, a screen, a couple of buttons, battery management and, best of all, a usb-c port.
I knew exactly what I wanted, so I went to my parts cabinet and grabbed some faders, and measured how many I could fit easily on that board.
Electrical Design
The electronics were pretty straightforward. I just needed all of my faders to be connected:

I rapidly routed a board, and proceeded to mill it.
Milling a PCB
I have a small desktop CNC I use for milling PCBs at home. I don't use it nearly as often as I'd like but I love having it available. It's much better than protoboard and way more fun.
I had a lot of issues milling this PCB though. It turns out most of the software I am used to using in Ubuntu flat out doesn't work on a Mac M1. So I had to find solutions to some of those issues.
The biggest problem was FlatCam. FlatCam is awesome and I love it but it seems barely maintained and running it is getting harder every day. I decided to try out alternatives. It turns out there really aren't any.
I ended up settling with Copper. This is a website provided by carbide3d that allows you to upload your layers and get a set of gcode files. You only get minimal options so I don't think I'd use it for anything but a one-sided PCB but it seemed acceptable.
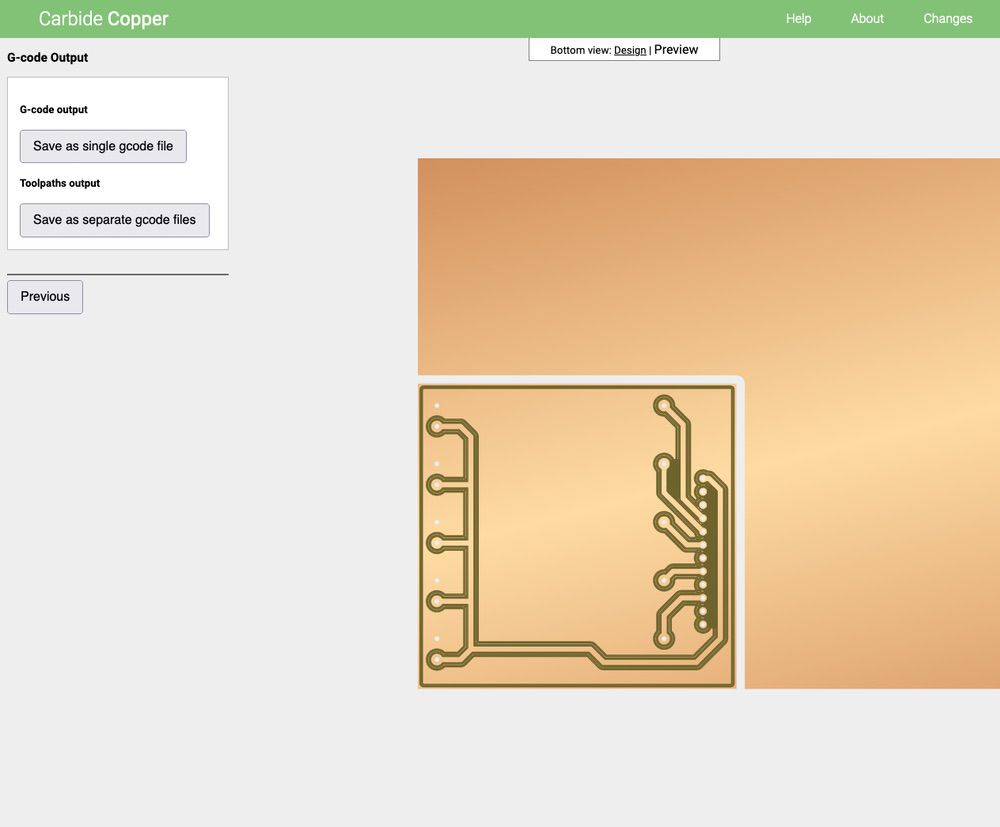
With my set of gcode files I felt ready to mill my PCB. Thankfully bCNC still runs flawlessly on a Pi so that part of my workflow remained intact. Here's a quick rundown on how I usually do it (I'll probably write a separate post to go into it in more detail).
I start by prepping a PCB blank. I clean it will alcohol and a scotch pad and set it on the bed using double-sided tape.
Next, I probe the PCB and set my working space.
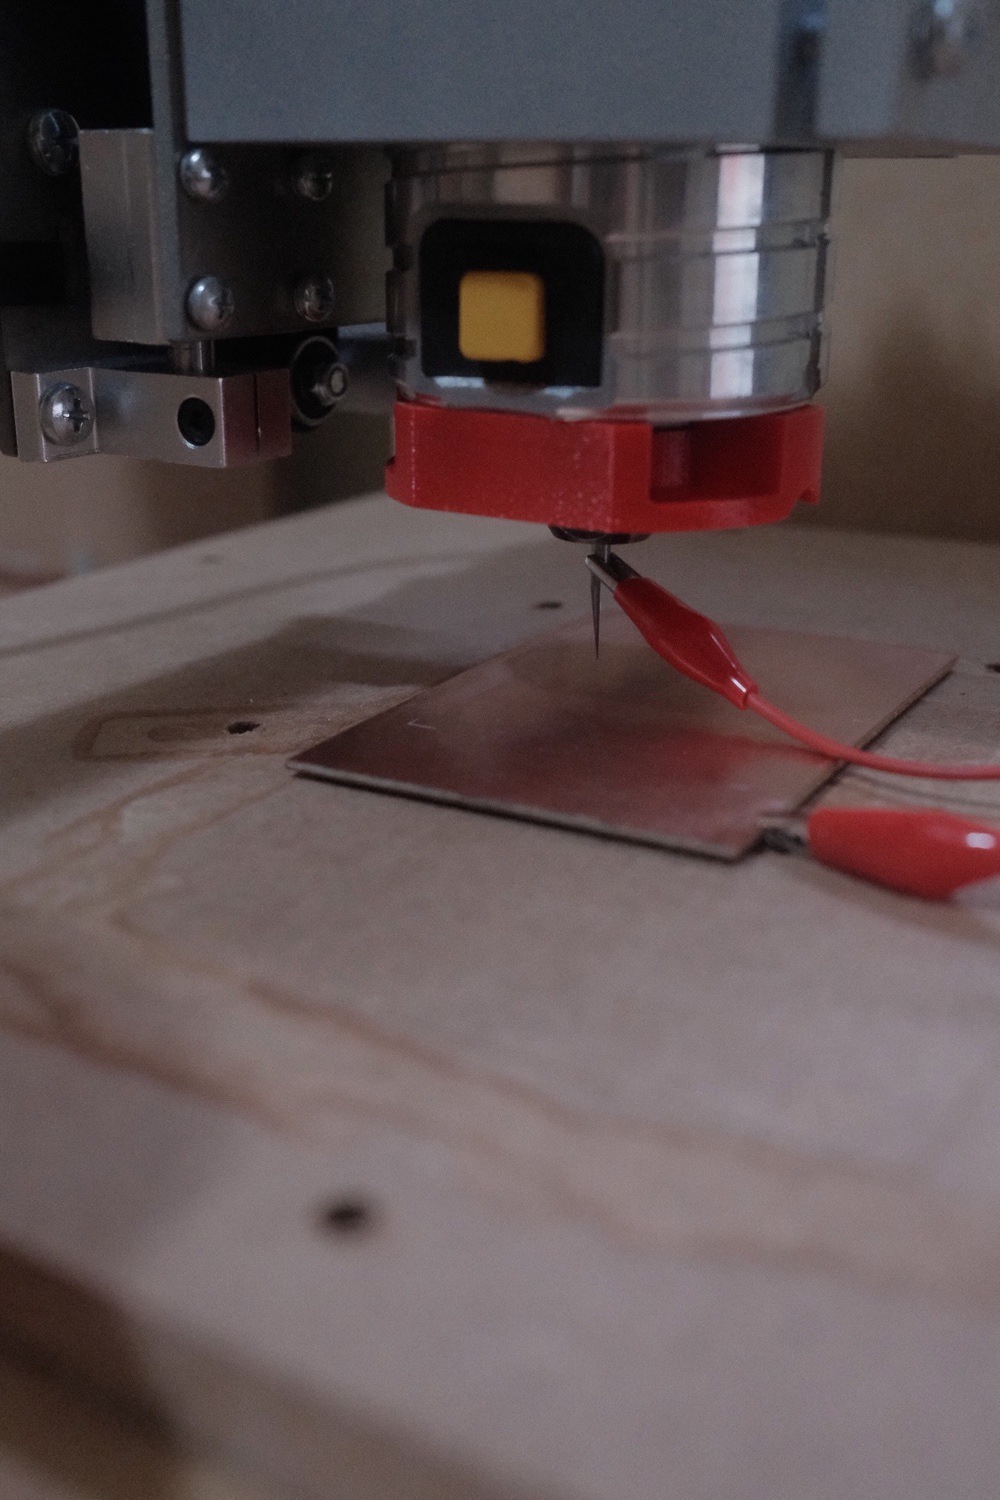
I the autolevel but don't click autolevel. If you've used bCNC before you know this breaks stuff.
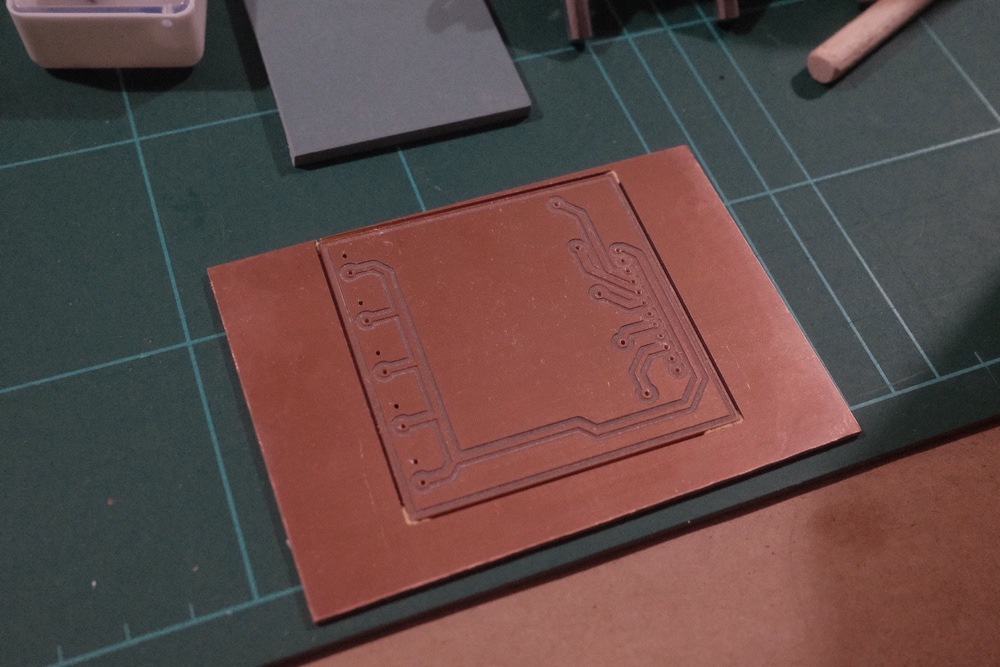
After cleaning it up, we can do soldering. This is generally the easy part. I leave as much space as possible around my traces, as much as 1mm if there's space. Soldering comes down to a lot of flux and as much solder as it takes. I'll usually coat parts of the PCB with the excess solder, this is probably useless but I feel like it makes for a better connection on these homemade PCBs.
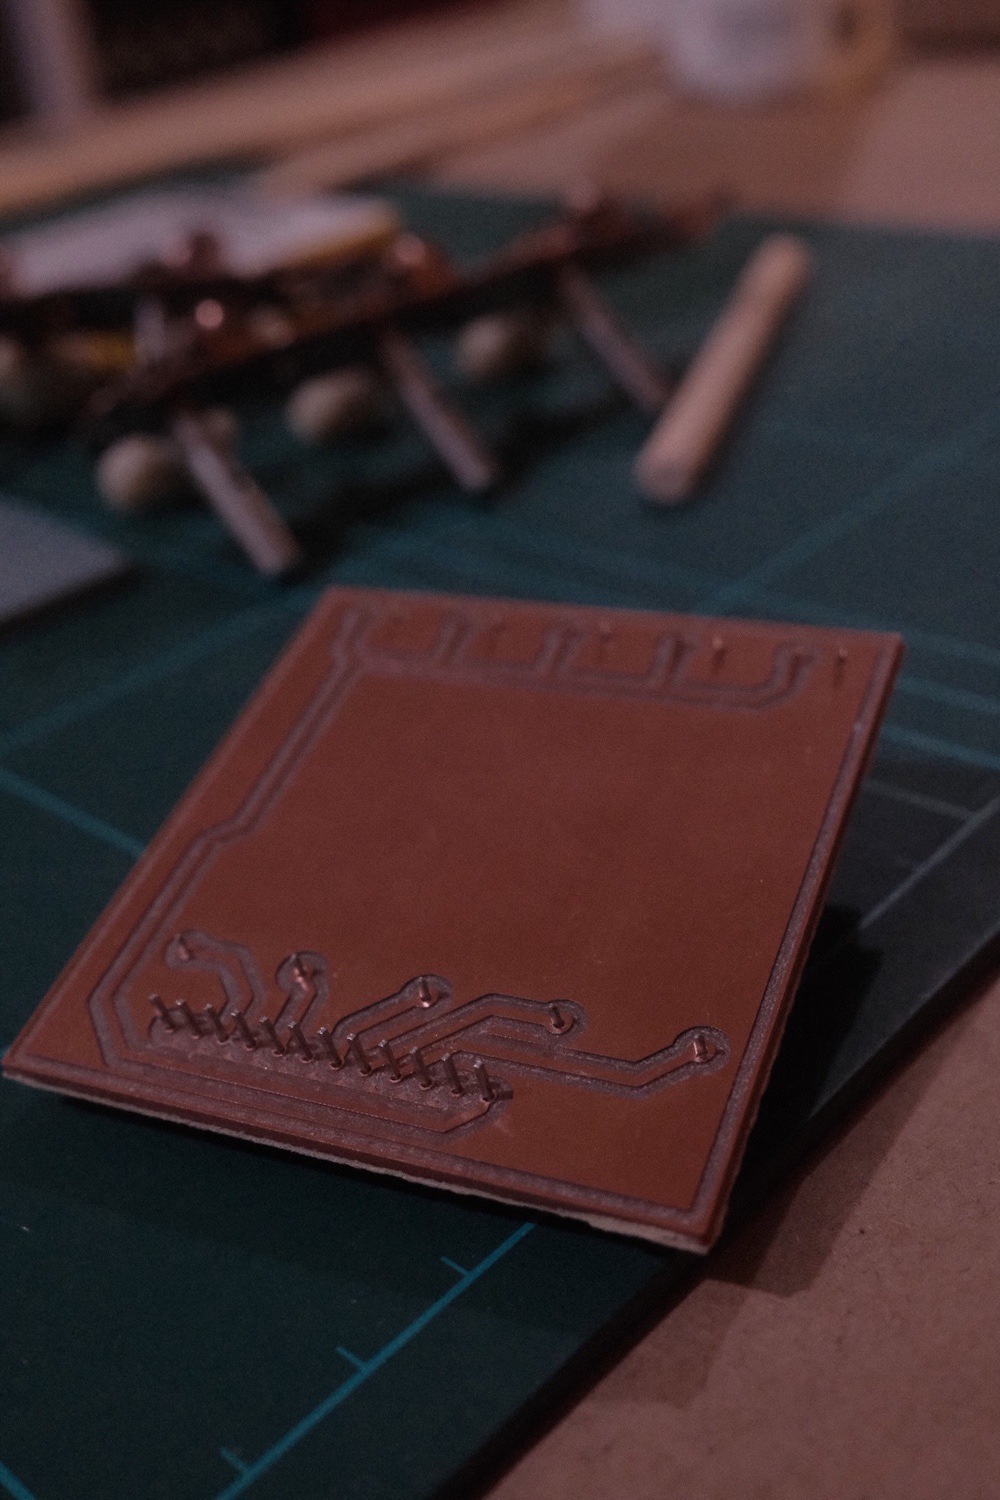
I'll do a quick fit check with all parts and then start soldering.
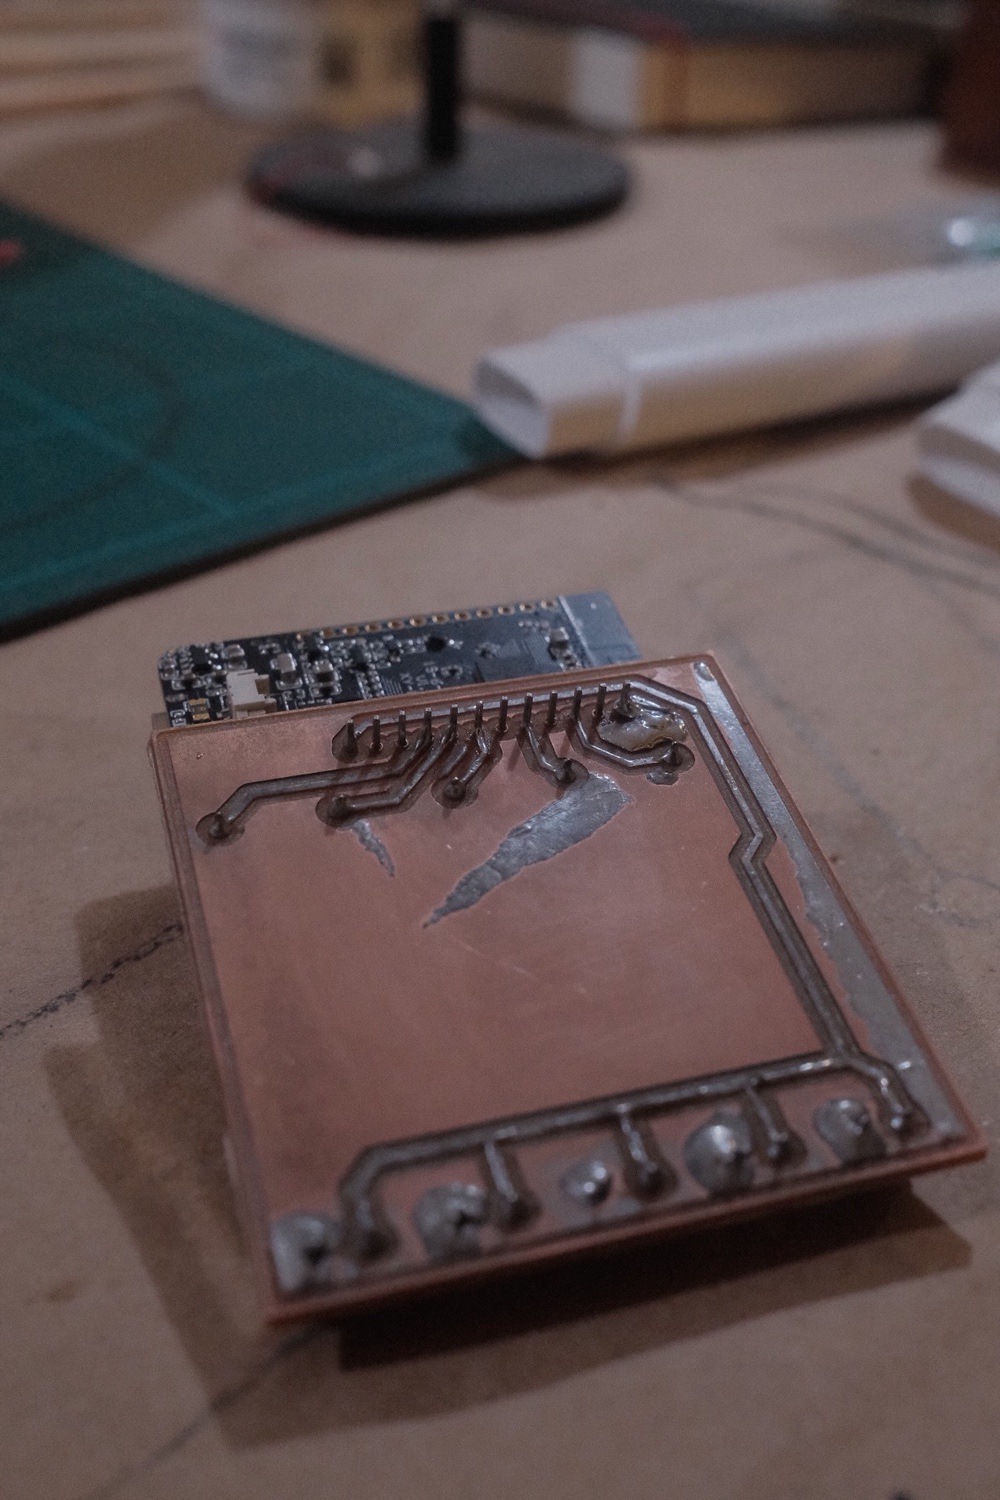
It ended up looking pretty good.
Firmware~
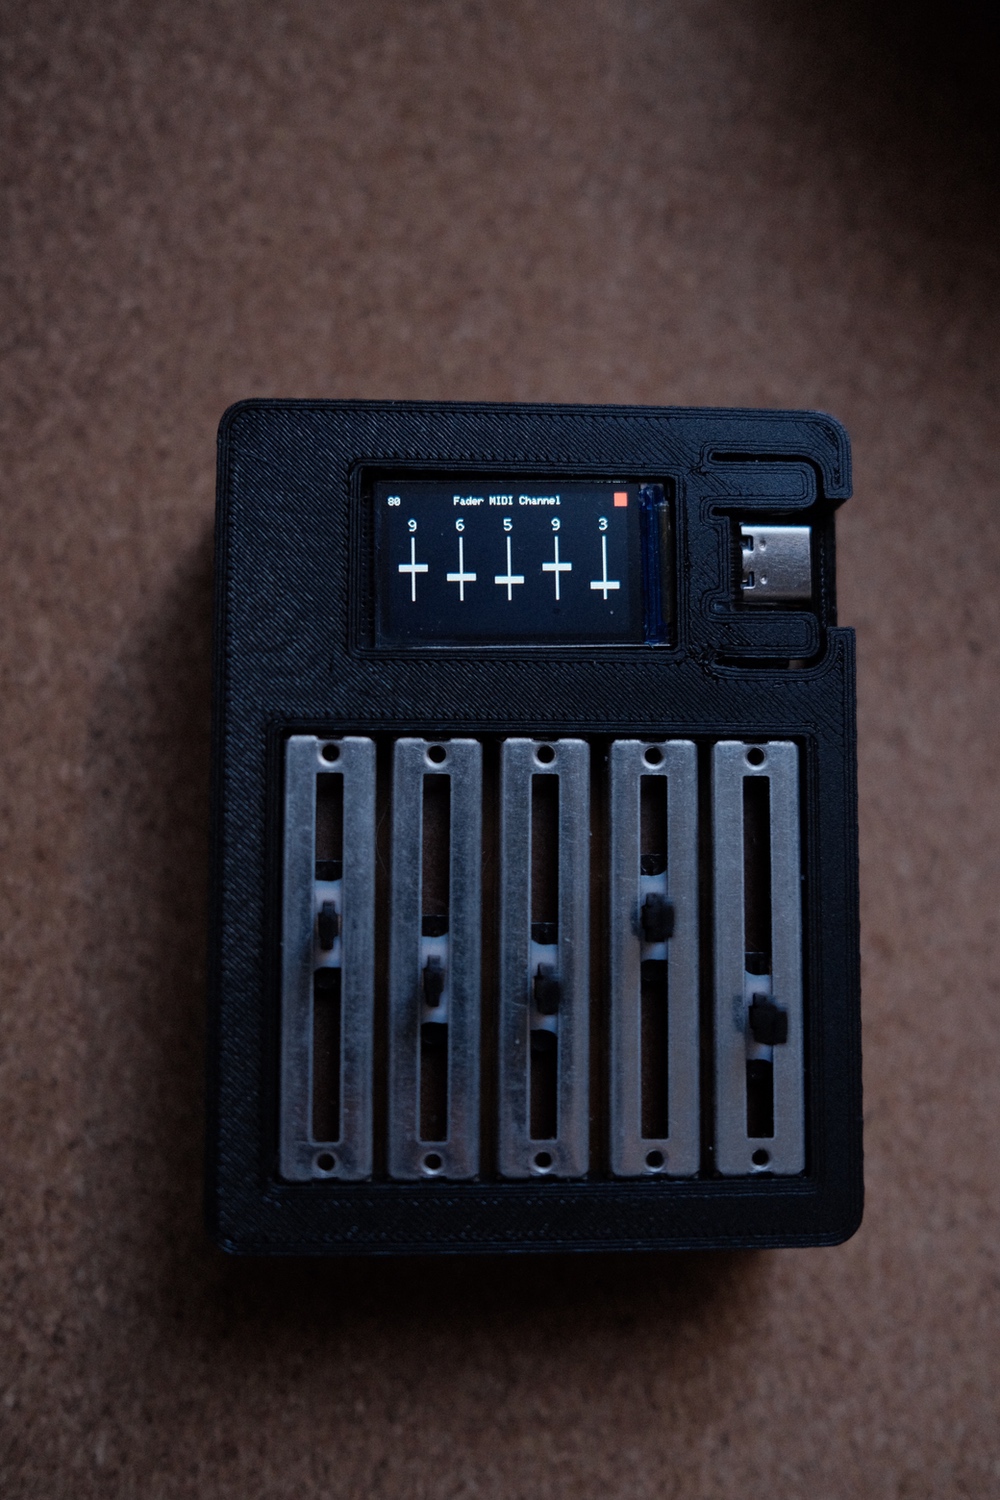
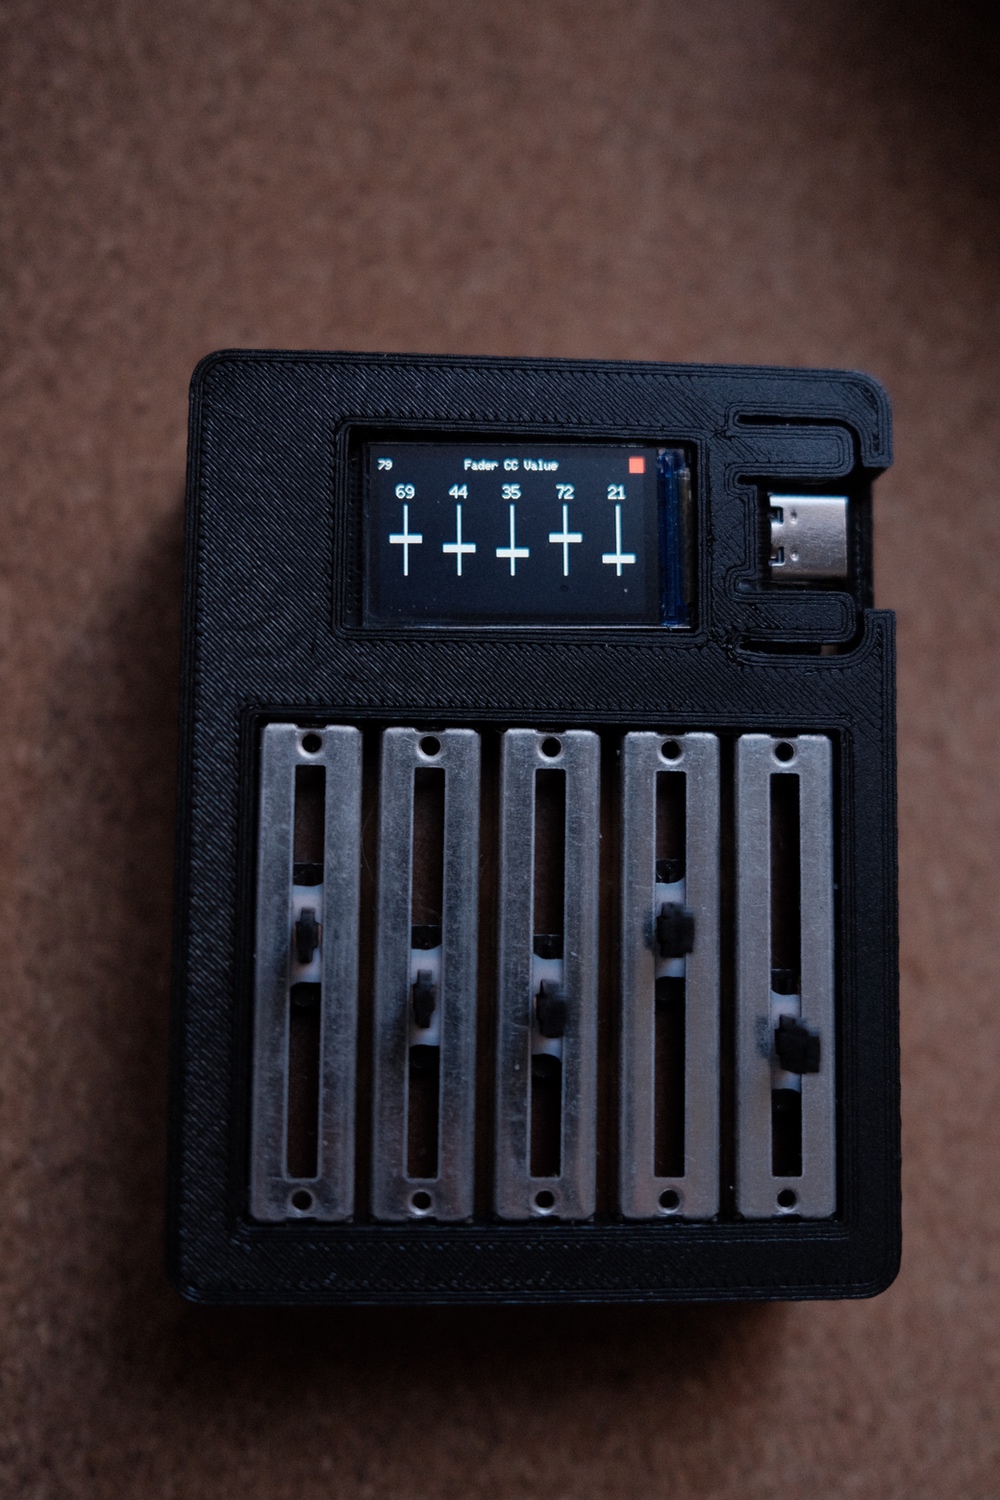
So the firmware for these things is usually the hard part. My idea was extremely simple. Each fader should send, via bluetooth midi, a cc on a channel. These should be modifiable from within the device. The UI would have to be something I came up with as I went. I used the excellent arduino_midi_library with a bluetooth transport and everything went surprisingly smoothly.
In a couple of days I had implemented all menus, battery management, bluetooth and settings. Of the features I wanted to add, I am only missing presets and a web app to load these in. Overall I am extremely happy with how performant and easy to use it is.
Case
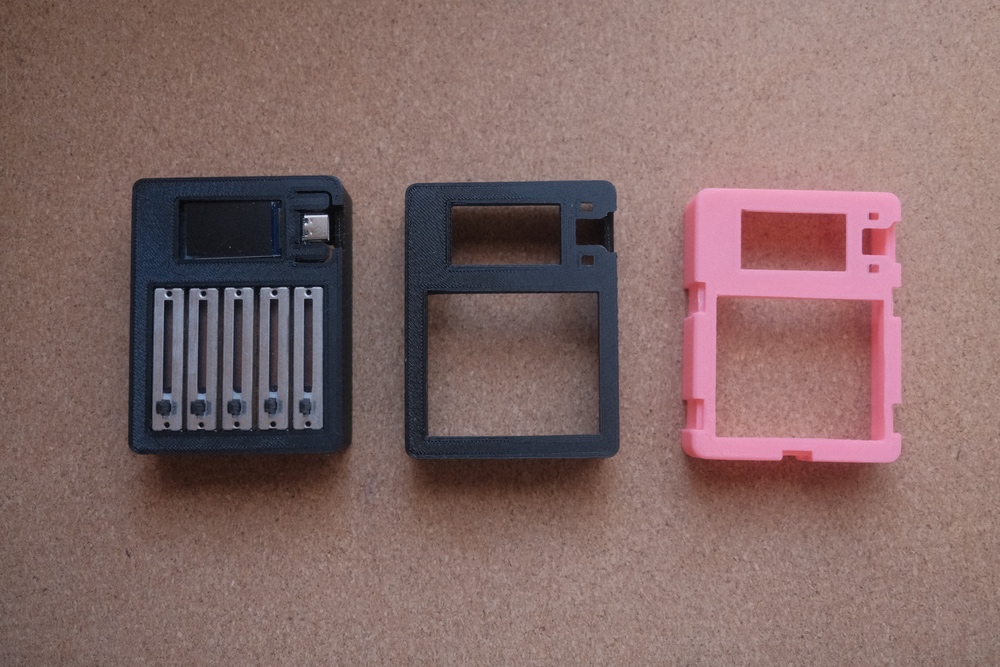
The case took a couple of iterations to get right. I hadn't done any 3d printing in a while so I was a bit rusty.
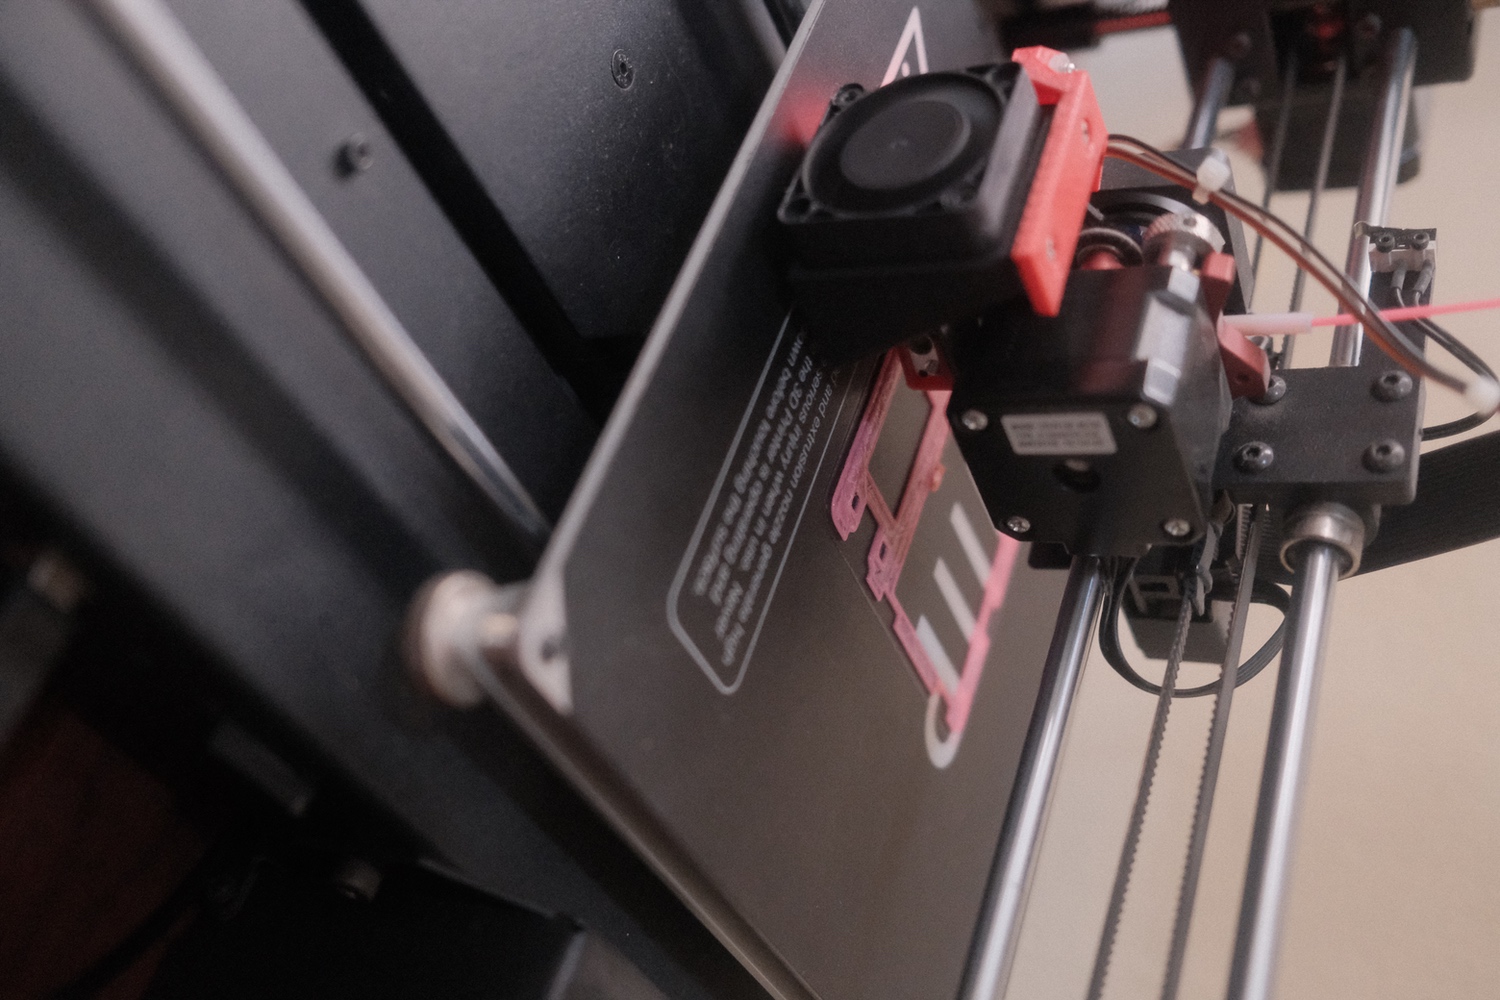
After shifting around the design a bit I came up with something that was both easy to print and very functional.
The End ~
I am very happy with the final result. It came out really clean, easy to use and highly functional. Setting up new devices is fast and easy and since it's compliant it connects seamlessly with other MIDI-BLE devices, like the widi masters.
Have a comment? Feel free to
email me.
Did you enjoy this post?
Buy me a coffee ☕️.